Headless kiosk app
Intro
Kirby is very versatile and can be used for things that are a little out of the ordinary. Let's assume that you need to create a Kiosk application for use in a showroom or museum setting. The app should run on Desktop computers as well as Android Tablets and iPads.
The space the Kiosk will be used in has very patchy or no internet connection, so the application needs to be entirely self-contained, and make no external internet calls at all.
This recipe will cover using Kirby to handle the content and imagery, and generating a static version via 11ty. From there, we can use Electron Builder to generate the desktop versions, and Capacitor to create the mobile device apps.
Preparation
If you have not used Kirby headless before, please take a look at the Going Headless cookbook guide before continuing, as this will explain the basic principles.
To keep this guide simple, we will be using data from the Kirby KQL Sandbox which does not need any authentication. In reality, you will likely be using a local install of Kirby as a source for the data.
It would be safe to disable authentication if that is the case. If you are using a publicly accessible headless instance of Kirby, using authentication is strongly advised. Making use of DotENV is also recommended.
First steps
To begin with, we will need to set up 11ty in accordance with the documentation. You can also use the Kirby Eleventykit as a basis for this, which already has a simple connection setup. This guide assumes a basic understanding of 11ty.
With that out the way, we can make a start with getting our data from Kirby and into 11ty.
We will make a small site the pulls in the Photography section of the Starter Kit, along with the text and images to make a basic information site.
In the _data folder, create a photography.js file with the following code in it:
const { $fetch } = require("ofetch");
module.exports = async function () {
  const api = "https://kql.getkirby.com/api/query";

  const response = await $fetch(api, {
    method: "post",
    body: {
      query: "page('photography').children.sortBy('date', 'desc')",
      select: {
        title: true,
        text: "page.text.toBlocks.toHtml",
        slug: true,
        date: "page.date.toDate('d.m.Y')",
        poster: {
          query: "page.images.first",
          select: {
            url: true,
          },
        },
        images: {
          query: "page.images",
          select: {
            url: true,
          },
        },
      },
    },
  });

  return response.result;
};
This will enable us to generate a list of the photography pages on the main index.html file of the project. You can do this by editing the index.njk file to contain the following:
---
layout: default.njk
data: photography
permalink: /
---

<header>
   <h1>Photography</h1>
</header>

<ul class="post-list">
{% for item in photography %}
<li>
  <h2> <a href="/photography/{{ item.slug }}/index.html">{{ item.title }}</a> </h2>
  <a href="/photography/{{ item.slug }}/index.html">
    <figure>
      {% image item.poster.url, "Image", 'home', "(max-width: 480px) 480px, (max-width: 960px) 960px, 100vw" %}
    </figure>
    </a>
  </li>
{% endfor %}
</ul>
This uses the data pulled in from Kirby to generate a list of the available Photography articles. At this point (and after a little CSS!) we should have something like this in the browser:

So far, so good. The next step is to create the individual post pages. We can do this with a little more Nunjucks in a photography subfolder. This will give us our subpages based on the data coming in from Kirby.
---
layout: photography.njk
pagination:
  data: photography
  size: 1
  alias: post
permalink: photography/{{ post.slug }}/index.html
---
<article>

  <header>
    <h1>{{ post.title }}</h1>
  </header>

  <div>
    {{ post.text | safe }}
    <ul class="post-list">
    {% for item in post.images %}
      <li>
        <figure>
        {% image item.url, "Image", post.slug, "(max-width: 480px) 480px, (max-width: 960px) 960px, 100vw" %}
        </figure>
      </li>
    {% endfor %}
    </ul>

    <a class="btn" href="../index.html">Back</a>
  </div>

</article>
So there we have the basics of our little site. We have made an index page, allowing us to click through to the desired article, and we have individual pages for each item. 11ty automatically generated all this from the JSON data provided to us by Kirby.
There is just one small problem. We need this app to run offline, without making any external calls. If you take a close look at the URLs for the images, you can see they are in fact being pulled in remotely:
<img src="https://kql.getkirby.com/media/pages/photography/landscape/5c061a39cb-1653485091/clouds-eat-mountain.jpg">We need to convert these into static assets within our projects file system, so that we can reference them from our code base rather than via a URL. Let's fix that!
Creating static image assets
Setting up a custom 11ty shortcode will help us here by leaning on the eleventy-image plugin which has the ability to cache files locally. Install it via Yarn:
yarn add @11ty/eleventy-imgNext, we need to update our .eleventy.js file too with a shortcode that will store the images locally and generate WebP & AVIF versions for us at the same time.
const path = require("path");
const Image = require("@11ty/eleventy-img");

async function imageShortcode(src, alt, subFolder, sizes) {
  let metadata = await Image(src, {
    urlPath: "/assets/images/" + subFolder,
    outputDir: "public/assets/images/" + subFolder,
    widths: ["480", "960", "auto"],
    formats: ["avif", "webp", "jpeg"],
    filenameFormat: function (id, src, width, format, options) {
      const extension = path.extname(src);
      const name = path.basename(src, extension);
      return `${name}-${width}w.${format}`;
    },
  });

  let imageAttributes = {
    alt,
    sizes,
    decoding: "async",
  };
  return Image.generateHTML(metadata, imageAttributes);
}

module.exports = function (eleventyConfig) {
  eleventyConfig.addWatchTarget("./src/sass/");
  eleventyConfig.addWatchTarget("./src/js/");
  eleventyConfig.addAsyncShortcode("image", imageShortcode);

  return {
    dir: {
      input: "src",
      output: "public",
    },
  };
};
Moving back to the Nunjuck's template for the index page, we adjust the call on the image shortcode:
{% image item.poster.url, "Image", 'home', "(max-width: 480px) 480px, (max-width: 960px) 960px, 100vw" %}The short code expects a src for the image, in this case we are feeding it a poster thumbnail image via item.poster.url. Next, we can set an alt text value. Thirdly, we can set a folder name to store the images in, using /assets/images as a base.
In this case, the images will be generated in an /assets/images/home folder. Finally, we can pass a set of sizes to trigger the source set images.
The loop should now look like this:
{% for item in photography %}
<li>
  <h2><a href="/photography/{{ item.slug }}">{{ item.title }}</a></h2>
  <a href="/photography/{{ item.slug }}">
    <figure>
      {% image item.poster.url, "Image", 'home', "(max-width: 480px) 480px, (max-width: 960px) 960px, 100vw" %}
    </figure>
    </a>
  </li>
{% endfor %}
If we build the project now, and take a look at the generated HTML, we can see that we do indeed now have local images with absolute URLS:
<picture>
  <source type="image/avif" srcset="/assets/images/home/area-51-480w.avif 480w, /assets/images/home/area-51-933w.avif 933w" sizes="(max-width: 480px) 480px, (max-width: 960px) 960px, 100vw">
  <source type="image/webp" srcset="/assets/images/home/area-51-480w.webp 480w, /assets/images/home/area-51-933w.webp 933w" sizes="(max-width: 480px) 480px, (max-width: 960px) 960px, 100vw">
  <source type="image/jpeg" srcset="/assets/images/home/area-51-480w.jpeg 480w, /assets/images/home/area-51-933w.jpeg 933w" sizes="(max-width: 480px) 480px, (max-width: 960px) 960px, 100vw">
  <img alt="Image" decoding="async" src="/assets/images/home/area-51-480w.jpeg" width="933" height="1400"/>
</picture>
At this stage, we currently have a site running statically, that could be deployed to even very basic web hosting. Now we can tackle the next stage - let't turn this into a desktop application!
Desktop application
Preparation
Now for the exciting stuff. We need to do a little prep before we can generate our app, since we need to create some icons, and a background for the Apple DMG file.
We need a little CLI tool to help us out here. Install it globally:
yarn global add electron-icon-builderThe next step is to create a 1024 x 1024 image to use as an icon. Store it in a folder called icons/src in the root of your project. Create a folder icons/output to store the generated icons.
We can run this through electron-icon-builder to generate all the different sized icons and formats. Adjust the input path to match your absolute folder location on your harddisk.
electron-icon-builder --input=/Volumes/Server/Cookbooks/Kiosk/app/icons/src/camera.png --output=./icons/output --flattenFor the DMG app backgrounds, we need to create two images, one at 540 x 380 with a name of background.tiff and another at 1080 x 760 called background@x2.tiff. The latter will be used on Retina macs, and the file names are important.
Remember to leave room at the bottom of the image, as this is where the install icons will sit. Store these images in the output folder with all the icons created in the previous step.

Configuration
Let's move on to configuring the build for the app, now that we have all of our assets ready. Install electron, electron-builder and electron-serve via yarn.
yarn add electron
yarn add electron-builder
yarn add electron-serve
In the root of your project, create a file called main.js with the following code inside:
const path = require("path");
const { app, BrowserWindow } = require("electron");
const serve = require("electron-serve");
const loadURL = serve({ directory: "public" });

app.commandLine.appendSwitch("autoplay-policy", "no-user-gesture-required");

let mainWindow;

function createWindow() {
  // Create the browser window.
  mainWindow = new BrowserWindow({
    width: 1920,
    height: 1080,
    webPreferences: {
      nodeIntegration: true,
      webSecurity: false,
    },
    icon: path.join(__dirname, "icons/output/icons/favicon.png"),
    show: false,
    autoHideMenuBar: true,
  });

  loadURL(mainWindow);

  mainWindow.on("closed", function () {
    mainWindow = null;
  });
  mainWindow.once("ready-to-show", () => {
    mainWindow.show();
  });
}

app.on("ready", createWindow);
app.on("window-all-closed", function () {
  if (process.platform !== "darwin") app.quit();
});

app.on("activate", function () {
  if (mainWindow === null) createWindow();
});
This is a simple configuration for electron. The details of this code are outside the scope of this article, but can be referred to in the Electron documentation if you wish to learn more.
There are two parts of this you may wish to alter. Most browsers prevent the auto-playing of video unless it is muted. The following line removes this restriction, allowing you to autoplay video with sound on without requiring user input.
app.commandLine.appendSwitch("autoplay-policy", "no-user-gesture-required");The second part that may be altered is the mainWindow.
mainWindow = new BrowserWindow({
  width: 1920,
  height: 1080,
  webPreferences: {
    nodeIntegration: true,
    webSecurity: false,
  },
  icon: path.join(__dirname, "icons/output/icons/favicon.png"),
  show: false,
  autoHideMenuBar: true,
});
It is here that you can set the initial width and height of the application window, the favicon, as well as whether to show things like the address bar and status bar.
Finally, add the following to your package.json file:
"main": "main.js",
"build": {
  "appId": "com.photoexhibition.app",
  "productName": "Photos by Kirby",
  "files": [
    "public/**/*",
    "main.js"
  ],
  "directories": {
    "buildResources": "icons/output/icons"
  },
  "win": {
    "target": "nsis"
  },
  "linux": {
    "target": "appimage",
    "maintainer": "Mr Somebody",
    "vendor": "Mr Somebody",
    "category": "Graphics"
  },
  "mac": {
    "target": "dmg",
    "category": "public.app-category.photography",
    "mergeASARs": false
  },
  "dmg": {
    "window": {
      "width": "540",
      "height": "380"
    },
    "title": "Photo Exhibition"
  }
},
These settings control the Electron Builder build process to alter the output for various platforms. This is documented in the Electron Builder docs if you wish to alter the values.
First build
It's finally moment of truth time! Let's add a couple of NPM scripts to package.json so that we can easily kick off the build:
"electron-pack": "electron-builder",
"macuniversal": "yarn build && yarn electron-pack --universal",
"desktop": "yarn build && yarn electron-pack",
Running yarn desktop will generate a desktop app depending on the platform you are running the project on. If you are running on Windows, you will end up with a Windows installer in the dist folder. If you are on Apple Silicon Mac you will end up with a DMG that will only run on another Apple Silicon Mac. Running yarn macuniversal will generate an app that will work on both Apple Silicon and Intel based Macs.
Run either yarn desktop or yarn macuniversal depending on the platform you are running on. If all goes well, you will find an executable application inside the dist folder. In my case, I am running on Apple Silicon and successfully get a DMG file allowing me to install the app.
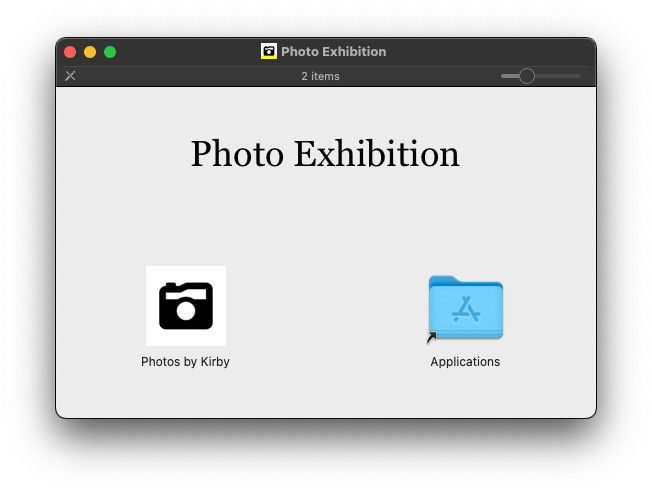
After installing the app, we can finally see the result of all our hard work!

Mobile applications
So that's the desktop application finished up. Let's take things further now, and generate mobile applications for iOS and Android from the same source files.
Prerequistes
We will be using Capacitor to help us out with this, which in turn depends on Xcode and Android Studio. Please set these up in accordance with the Capacitor environment setup and installing Capacitor itself into your project before proceeding.
Secondly, we need to configure Capacitor. In the root of your project, create a capacitor.config.ts file, containing the following:
import { CapacitorConfig } from '@capacitor/cli';

const config: CapacitorConfig = {
  appId: 'com.kirbyphotos.app',
  appName: 'photos',
  webDir: 'public',
  bundledWebRuntime: false
};

export default config;
Android application
Let's kick off with building the Android app. We need to add Capacitors Android package and the Android platform to make this happen.
yarn add @capacitor/android
npx cap add android
You will now find that an Android folder has been created in the root of your project, containing source code for your project. We can open this in Android Studio with the following:
npx cap open androidThe first time you do this, Android Studio should do a bunch of setting up due to the dependencies in the project. Just allow it to do its thing, which may take some time depending on your machine. However, once done, opening the project again later should be much quicker.
With an Emulator configured in Android Studio, we can go ahead and hit the green Play button on the main toolbar, which will launch the project and allow us to preview it on an emulated device.

iOS application
Next up is creating an iOS version. The process is quite similar. First we need to add the Capacitor iOS Package:
yarn add @capacitor/iosThen generate the Xcode project in a similar fashion as we did before:
npx cap add ios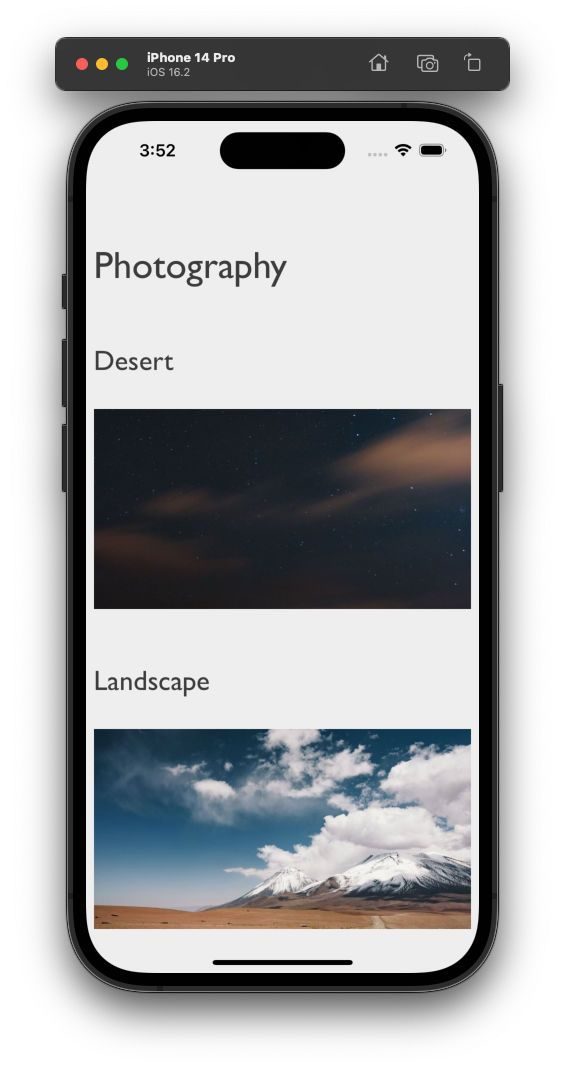
Finally, we can make generating the projects simpler by adding those commands to the scripts section of package.json:
"android": "rm -rf android && npx cap add android",
"android:open": "npx cap open android",
"ios": "rm -rf ios && npx cap add ios",
"ios:open": "npx cap open ios"
Closing
There we have it! We now have means to create desktop and mobile devices applications, whilst leaning on the power of Kirby and 11ty to do the heavy lifting. Where to now?
Whilst out of the scope of this guide, from here you can build the distributable files in Xcode and Android Studio, and publish them via the respective app stores. I hope you found this guide useful, and I would like to see what you make with this!
