# Quickstart

All you need to know to get Kirby up and running: Installation, requirements and updates.

****

(screencast: https://www.youtube.com/watch?v=us4hwvMJbzs title: How to install Kirby in minutes text: Using Laravel Herd as local development environment to install Kirby in no time.)

****

Want to explore Kirby a bit without installing anything first? Check out our <a href="https://getkirby.com/try">instant online demo</a>.

## Requirements

###  Web Server

<p>Apache works out of the box. For nginx and Caddy, see our <a href="https://getkirby.com/docs/guide/quickstart#web-server-configuration">config examples</a>. <a href="https://getkirby.com/docs/cookbook/development-deployment/ddev">DDEV</a> works with our Cookbook recipe. Other servers can be used by advanced users.</p>
<p>If you want to use PHP's built-in server, you have to start it up with Kirby's router:</p>
<figure class="code">
<pre><code class="language-php">php -S localhost:8000 kirby/router.php</code></pre>
</figure>
###  PHP Version

<ul>
<li>PHP 8.4</li>
<li>PHP 8.3 (recommended)</li>
<li>PHP 8.2</li>
</ul>

Kirby needs a pretty standard set of PHP extensions. See the full list of required, recommended and optional <a href="https://getkirby.com/docs/reference/system/requirements#php-extensions">PHP extensions</a>
###  Browsers for the Panel

<p>Kirby does not modify the output of your site's templates and thus has no effect on the browser requirements for your site's frontend. However, the Panel is built on modern browser features and has a couple browser requirements which need to be met by your site's editors</p>
<div class="table">
    <table>
        <tr>
            <th>Desktop</th>
            <th>Mobile</th>
        </tr>
        <tr>
            <td class="prose">
                <ul>
                        <li>Firefox 110+</li>
                        <li>Chrome 106+</li>
                        <li>Safari 16+</li>
                        <li>Edge 106+</li>
                        <li>Opera 94+</li>
                </ul>
            </td>
            <td class="prose">
                <ul>
                        <li>Mobile Safari 16+</li>
                        <li>Android Browser 126+</li>
                        <li>Chrome for Android 126+</li>
                </ul>
            </td>
        </tr>
    </table>
</div>

## Installing Kirby

You can install Kirby in a few quick steps in different ways. More instructions on installing and updating Kirby can be found in our <a href="https://getkirby.com/docs/guide/install-guide">detailed installation guides</a>

###  Manual

<p>We provide two downloadable kits for you to get started with: </p>
<div class="columns" style="--columns: 2; --gap: var(--spacing-2)">
    <div class="p-6 bg-light">
        <h3>
            <a href="https://download.getkirby.com" class="btn btn--filled">
                <svg xmlns="http://www.w3.org/2000/svg" data-type="download" viewbox="0 0 24 24" role="img" aria-labelledby="e3002739-69e3-42c8-a698-aabba7c6a56a"><title id="e3002739-69e3-42c8-a698-aabba7c6a56a">Download</title><path d="M13 10H18L12 16L6 10H11V3H13V10ZM4 19H20V12H22V20C22 20.5523 21.5523 21 21 21H3C2.44772 21 2 20.5523 2 20V12H4V19Z"></path></svg> Starterkit
            </a>
        </h3>
        <p class="color-gray-800">
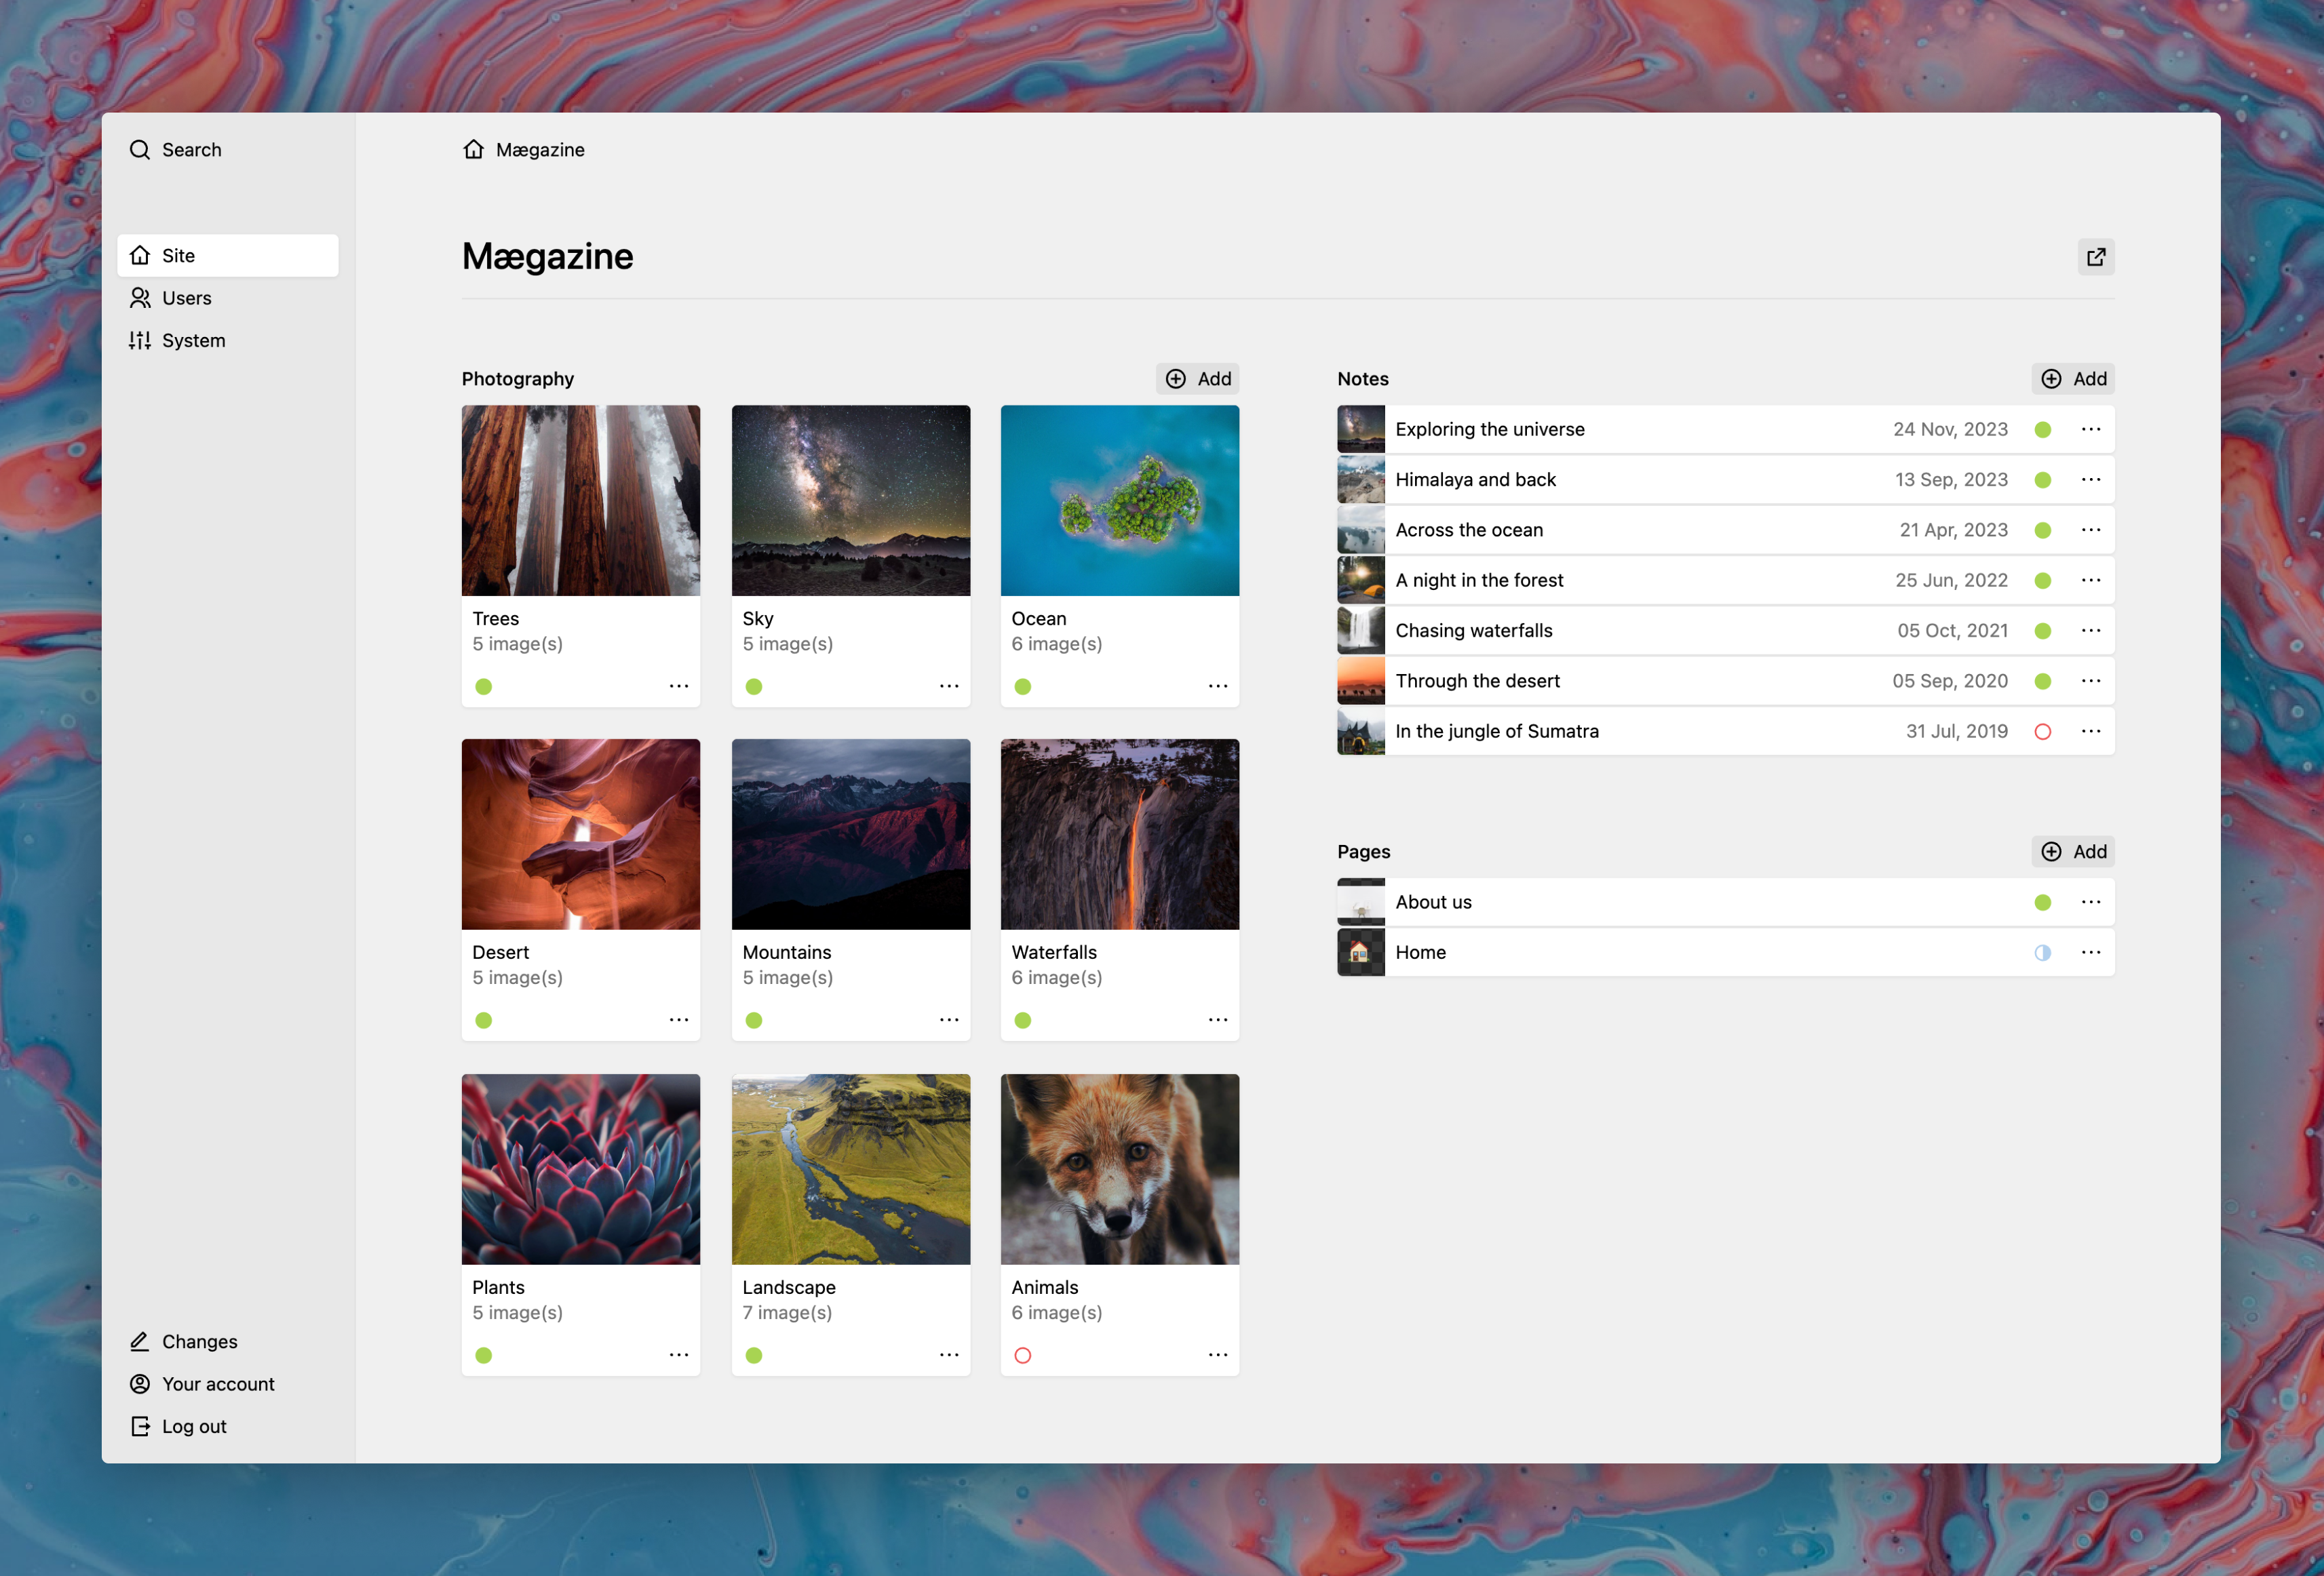
            The <b>Starterkit</b> is a full-blown Kirby installation with a lot of example content, blueprints, templates and more. It is ideal for new users to explore many of Kirby's options and get to know the Panel.
        </p>
    </div>
    <div class="p-6 bg-light">
        <h3>
            <a href="https://github.com/getkirby/plainkit/archive/main.zip" class="btn btn--filled">
                <svg xmlns="http://www.w3.org/2000/svg" data-type="download" viewbox="0 0 24 24" role="img" aria-labelledby="fb277ae2-0a60-41d1-a117-c32871f128d4"><title id="fb277ae2-0a60-41d1-a117-c32871f128d4">Download</title><path d="M13 10H18L12 16L6 10H11V3H13V10ZM4 19H20V12H22V20C22 20.5523 21.5523 21 21 21H3C2.44772 21 2 20.5523 2 20V12H4V19Z"></path></svg> Plainkit
            </a>
        </h3>
        <p class="color-gray-800">
            The <b>Plainkit</b> is a minimal Kirby setup with the basics you need to start a project from scratch. It is the ideal choice if you are already familiar with Kirby and want to start step-by-step.
        </p>
    </div>
</div>
<ol>
<li>Extract the contents of the ZIP file into your server's <abbr title="The folder on a web server that holds the web pages for a specific website/domain. Also called docroot. Typical folder names are for example www, public_html or htdocs."><a href="https://getkirby.com/docs/glossary/#document-root">Document root</a></abbr></li>
<li>Visit your new Kirby site in your browser at <code class="type">yourdomain.com</code></li>
<li>Visit the <abbr title="The Panel is Kirby's fast and powerful web interface to manage your website in the browser. The Panel is highly customizable in many ways for different project needs."><a href="https://getkirby.com/docs/glossary/#panel">Panel</a></abbr> at <code class="type">yourdomain.com/panel</code> to <a href="#create-your-first-account">create your first account</a></li>
</ol>
###  Herd

<p><a href="https://herd.laravel.com/">Herd</a> is a fast, native PHP development environment for macOS and Windows. You can install Kirby very quickly and intuitively with Herd’s one-click installers.</p>
<ul>
<li><a href="https://herd.laravel.com/new/getkirby/starterkit">Install the Starterkit with Herd</a></li>
<li><a href="https://herd.laravel.com/new/getkirby/plainkit">Install the Plainkit with Herd</a></li>
</ul>
###  Kirby CLI

<p>You can install a Kirby kit via the <a href="https://github.com/getkirby/cli">Kirby CLI</a> as follows:</p>
<p><strong>Starterkit</strong></p>
<figure class="code">
<pre><code class="language-bash">kirby install:kit Starterkit</code></pre>
</figure>
<p><strong>Plainkit</strong></p>
<figure class="code">
<pre><code class="language-bash">kirby install:kit Plainkit</code></pre>
</figure>
<p>In both cases you will be prompted to specify a folder name to install into.</p>
<p>More information about installing and updating Kirby via the CLI in our <a href="https://getkirby.com/docs/guide/install-guide/cli">installation guide</a>.</p>
###  Composer

<p><a href="https://getcomposer.org">Composer</a> is a dependency manager for PHP. If you have never used Composer before, follow the instruction on the <a href="https://getcomposer.org/doc/00-intro.md">Composer website</a>.</p>
<p>In a terminal window, navigate to the place where you want to install Kirby. Then run one of the following commands to create a new project based on the Starterkit or Plainkit.</p>
<p><strong>Installing the Starterkit</strong></p>
<figure class="code">
<pre><code class="language-bash">composer create-project getkirby/starterkit project-folder</code></pre>
</figure>
<p><strong>Installing the Plainkit</strong></p>
<figure class="code">
<pre><code class="language-bash">composer create-project getkirby/plainkit project-folder</code></pre>
</figure>
<p>More information about installing and updating Kirby via Composer in our <a href="https://getkirby.com/docs/guide/install-guide/composer">installation guide</a>.</p>
###  Git

<p>In a terminal window, navigate to the place where you want to install Kirby. Then run one of the following commands to create a new project based on the Starterkit or Plainkit.</p>
<p><strong>Installing the Starterkit</strong></p>
<figure class="code">
<pre><code class="language-bash">git clone https://github.com/getkirby/starterkit project-folder</code></pre>
</figure>
<p><strong>Installing the Plainkit</strong></p>
<figure class="code">
<pre><code class="language-bash">git clone https://github.com/getkirby/plainkit project-folder</code></pre>
</figure>
<p>More information about installing and updating Kirby via Git in our <a href="https://getkirby.com/docs/guide/install-guide/git">installation guide</a>.</p>

<figure class="image"><a data-lightbox href="https://assets.getkirby.com/media/pages/docs/guide/quickstart/d2b4245d2d-1717846665/starterkit.png?width=3426&amp;height=2324&amp;enlarge=0"><img alt="" class="rounded" height="627" loading="lazy" sizes="auto" src="https://assets.getkirby.com/media/pages/docs/guide/quickstart/d2b4245d2d-1717846665/starterkit.png?width=924&amp;height=627&amp;enlarge=0" srcset="https://assets.getkirby.com/media/pages/docs/guide/quickstart/d2b4245d2d-1717846665/starterkit.png?width=462&amp;height=313&amp;enlarge=0 462w, https://assets.getkirby.com/media/pages/docs/guide/quickstart/d2b4245d2d-1717846665/starterkit.png?width=690&amp;height=468&amp;enlarge=0 690w, https://assets.getkirby.com/media/pages/docs/guide/quickstart/d2b4245d2d-1717846665/starterkit.png?width=924&amp;height=627&amp;enlarge=0 924w, https://assets.getkirby.com/media/pages/docs/guide/quickstart/d2b4245d2d-1717846665/starterkit.png?width=1380&amp;height=936&amp;enlarge=0 1380w, https://assets.getkirby.com/media/pages/docs/guide/quickstart/d2b4245d2d-1717846665/starterkit.png?width=1848&amp;height=1254&amp;enlarge=0 1848w" width="924"></a></figure>

## Web server configuration

Kirby needs a few rewrite rules to route all requests through its front controller and to block access to the `content`, `site` and `kirby` folders. On Apache, the shipped `.htaccess` file takes care of this. Other web servers have to be configured manually:

###  Apache

<p>Apache works out of the box. Kirby ships with a <code class="type">.htaccess</code> file that contains all necessary rewrite rules and security settings, so there's nothing to configure.</p>
<div class="box box--info">
<div class="box-icon iconbox bg-black color-white"><svg xmlns="http://www.w3.org/2000/svg" data-type="info" viewBox="0 0 24 24" aria-hidden="true"><path d="M12 22C6.47715 22 2 17.5228 2 12C2 6.47715 6.47715 2 12 2C17.5228 2 22 6.47715 22 12C22 17.5228 17.5228 22 12 22ZM12 20C16.4183 20 20 16.4183 20 12C20 7.58172 16.4183 4 12 4C7.58172 4 4 7.58172 4 12C4 16.4183 7.58172 20 12 20ZM11 7H13V9H11V7ZM11 11H13V17H11V11Z"/></svg></div>
<div class="box-text">
	<p>When copying files to a remote server via (S)FTP, make sure to copy the <code class="type">.htaccess</code> file as well. By default, files starting with a dot are invisible in the filesystem, so make sure to enable the display of invisible files before copying.</p></div>
</div>
<p>If your site runs in a subfolder, you have to adjust the <code class="type">RewriteBase</code> in the <code class="type">.htaccess</code> file. See our <a href="https://getkirby.com/docs/guide/troubleshooting/installation">installation troubleshooting guide</a> if links or the entire site break.</p>
###  nginx

<p>nginx does not support <code class="type">.htaccess</code> files, so Kirby's rewrite rules and security settings have to go into your nginx config. Create a new <code class="type">server</code> block, e.g. in <code class="type">nginx/conf.d/kirby.conf</code>:</p>
<figure class="code">
<figcaption>nginx/conf.d/kirby.conf</figcaption>
<pre><code class="language-nginx">server {
  listen 8080; # Can be omitted if nginx runs on port 80
  index index.php index.html;
  server_name localhost; # Adjust to your domain setup
  root /usr/share/nginx/html; # Adjust to your setup

  default_type text/plain;
  add_header X-Content-Type-Options nosniff;

  rewrite ^/(content|site|kirby)/(.*)$ /error last;
  rewrite /\.(?!well-known/) /error last;
  rewrite ^/(?!app\.webmanifest)[^/]+$ /index.php last;

  location / {
    try_files $uri $uri/ /index.php$is_args$args;
  }

  location ~* \.php$ {
    try_files $uri =404;
    fastcgi_pass php:9000; # Adjust to your setup
    include fastcgi.conf;
    fastcgi_split_path_info ^(.+\.php)(/.+)$;
    fastcgi_param PATH_INFO $fastcgi_path_info;
    fastcgi_param SERVER_PORT 8080; # Only needed if the external port differs from the listen port
  }
}</code></pre>
</figure>
<p>For a line-by-line explanation of this config and notes on TLS certificates, see our <a href="https://getkirby.com/docs/cookbook/development-deployment/nginx">Kirby meets nginx</a> cookbook recipe.</p>
###  Caddy

<p>Caddy does not support <code class="type">.htaccess</code> files, so Kirby's rewrite rules and security settings have to go into your <code class="type">Caddyfile</code>. Caddy loads this file from the current directory, so run Caddy from the folder that contains it or pass the path with <code class="type">caddy run --config /path/to/Caddyfile</code>:</p>
<figure class="code">
<figcaption>Caddyfile</figcaption>
<pre><code class="language-caddy">(common) {
    php_fastcgi php:9000 # Adjust to your setup
    file_server
    encode zstd gzip
}

(kirby) {
    @blocked {
        path /content/* /site/* /kirby/* /.*
    }
    error @blocked "Not found" 404
    handle_errors {
        rewrite * /error # This should reference your Kirby error page
        import common
    }
}

mydomain.com { # Adjust to your setup
    import common
    import kirby
    root * /usr/share/caddy # Adjust to your setup
    tls name@user.com # Adjust to your setup
}</code></pre>
</figure>
<p>For a line-by-line explanation of this config, see our <a href="https://getkirby.com/docs/cookbook/development-deployment/caddy">Kirby meets Caddy</a> cookbook recipe.</p>

## Create your first account

Kirby's control panel (aka. the Panel) comes without any pre-installed accounts. Open `http://yourdomain.com/panel` in the browser to start the installer and create the first account.

<warning>
For security reasons, you cannot install the Panel on a public server by default. To allow this, you can enable the <a href="https://getkirby.com/docs/reference/system/options/panel#allow-the-panel-to-be-installed-on-a-remote-server">`panel.install` option</a>.
</warning>

## Purchase license & activate your installation

Once you publish your website, you need to <a href="https://getkirby.com/buy">purchase a Kirby license</a>. We will send you a unique license code for your domain. You can activate your license with the following steps:

###  In the Panel

1. Open the Panel at `http://yourdomain.com/panel` and log in.
2. Click on "Activate" on the bottom left.
3. Enter your license code and your email address and press "Ok".
###  Without using the Panel

If you don’t want the Panel to connect to our server, registration via the Panel fails, or you are not using the Panel at all, you can download your license files directly from our licenses website:

1. Visit <a href="https://hub.getkirby.com">hub.getkirby.com</a>.
2. Log in with the email you used when you purchased the license and any order number.
3. In the list of your licenses, click on the key you want to activate.
4. Use the "Download license file" button to download the license file.
5. Rename the downloaded file to `.license` (without extensions).
6. Place it in the `/site/config/` folder of your Kirby installation.

<since v="5.5.0">
<info>
If your installation is used for development only and is not publicly accessible (e.g. a staging or preview server), you can activate it as a **development site** with a free <a href="https://getkirby.com/license#free-licenses__usage-for-a-development-installation">development license</a> instead. When activating in the Panel, confirm that you comply with the license terms and choose to activate as a development site.
</info>
</since>

## Where to go from here

### <a href="https://getkirby.com/docs/guide/tour">A tour around the house</a>
Now that you have successfully installed Kirby on your server, it's time to explore your new CMS. Get yourself a cup of tea (or whatever you like most) and go on a <a href="https://getkirby.com/docs/guide/tour">tour to explore the Starterkit</a> with us.

****

### <a href="https://getkirby.com/docs/guide">Guide</a>

Our guide introduces you to every aspect of Kirby. From your first <abbr title="Templates are .php files that render the content of your pages. They contain the HTML for the page together with some PHP control structures. They may also contain logic, but we recommend the use of controllers for more complex logic. Templates are stored in /site/templates."><a href="https://getkirby.com/docs/glossary/#template">template</a></abbr> to complex extensions. It should always be the <a href="https://getkirby.com/docs/guide">starting point for your research</a>.

****

### <a href="https://getkirby.com/docs/reference">Reference</a>

Once you have familiarized yourself with the basics, the <a href="https://getkirby.com/docs/reference">Reference</a> is the number one resource you will keep getting back to. It's a collection of every method, option, helper, tag, root, url and more.

****

### <a href="https://getkirby.com/docs/cookbook">Cookbook</a>

The <a href="https://getkirby.com/docs/cookbook">Cookbook</a> is a collection of solutions you can build with Kirby, explaining how to build them step by step. Starting from simple things like menus to frontend authentication, headless CMS setups and more.

****

### <a href="https://getkirby.com/plugins">Plugins</a>
Our plugin developers created dozens of fantastic plugins for Kirby. Check out  our <a href="https://getkirby.com/plugins">official plugin repository</a> before creating your own solution for common features.

****

### <a href="https://getkirby.com/docs/guide/troubleshooting">Troubleshooting</a>

If you encounter any problems, make sure to check our <a href="https://getkirby.com/docs/guide/troubleshooting">guide on some common pitfalls</a> and how to solve them.

****

### <a href="https://forum.getkirby.com/">Forum</a>

The community in the <a href="https://forum.getkirby.com/">Kirby Forum</a> is always there to help out whenever you get stuck. It's likely that someone already had the same problem, so using the search function might uncover a solution within seconds. If you can't find a helpful topic, drop us your question.